Introduction
Reclaimed wood is a popular choice among woodworking enthusiasts and professionals alike. Its unique character and history can add warmth and depth to any piece of furniture. However, achieving a professional finish on reclaimed wood presents its own set of challenges. In this article, we will delve into advanced techniques focusing on joinery, precision, and the finishing process to help you create high-quality furniture from reclaimed materials.
Understanding Reclaimed Wood
Before diving into the finishing techniques, it's important to understand what makes reclaimed wood special. Typically sourced from old barns, factories, and other structures, reclaimed wood often carries imperfections, unique grain patterns, and varying colors due to its age and previous use. These characteristics can create stunning visual appeal, but they can also complicate the finishing process.
Preparing Reclaimed Wood for Finishing
Preparation is key to achieving a professional finish. Here are steps you should follow:
- Inspection: Carefully inspect each piece of wood for nails, screws, and other debris. Remove any foreign objects to prevent damage during the sanding process.
- Cleaning: Clean the wood thoroughly to remove dirt, grease, and old finishes. Use a mixture of warm water and mild soap, followed by a thorough rinsing.
- Drying: Allow the wood to dry completely, as moisture can affect the finish. Use a moisture meter to ensure the wood is below 10% moisture content.
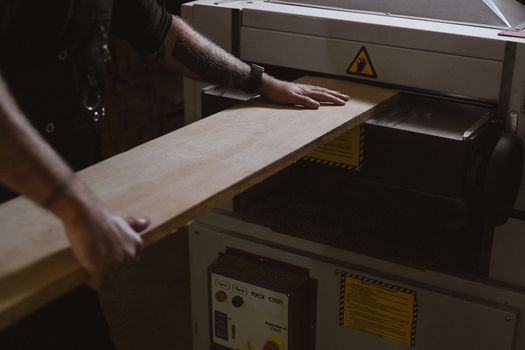
Sanding for Smoothness
Sanding is crucial for preparing the surface of reclaimed wood. The goal is to create a smooth, even surface without removing the wood's character.
- Start with Coarse Grit: Begin with a coarse grit sandpaper (60-80 grit) to remove rough spots and imperfections. Sand in the direction of the grain to avoid scratches.
- Progress to Finer Grits: Gradually move to finer grits (120-220 grit) to achieve a smooth finish. Each progression should remove the scratches left by the previous grit.
- Use a Random Orbital Sander: To make the sanding process more efficient and effective, consider using a random orbital sander. This tool helps achieve a smooth surface while minimizing swirl marks.
Advanced Joinery Techniques
When working with reclaimed wood, the joinery you choose can significantly affect both the strength and aesthetics of your piece.
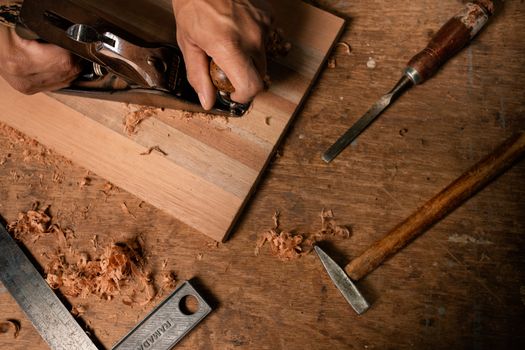
- Mortise and Tenon Joints: This classic joint offers strength and durability, making it ideal for furniture. Ensure your cuts are precise for a snug fit, which can be achieved using a chisel and mallet.
- Dovetail Joints: Known for their interlocking nature, dovetail joints not only provide strength but also add a decorative element to your furniture. Precision is key; consider using a dovetail jig for consistency.
- Doweling: For a more modern approach, dowel joints can be an excellent way to join reclaimed wood. Use a doweling jigs to ensure accurate alignment and spacing.
Selecting the Right Finish
The finish you select will determine the final appearance and protection of your reclaimed wood furniture. Here are some popular options:
- Oil Finishes: Tung oil and linseed oil penetrate deep into the wood, enhancing its natural beauty while providing a level of protection. They can be reapplied easily over time.
- Polyurethane: For a more durable finish, consider using polyurethane. It comes in various sheens and protects against moisture and wear. Choose water-based polyurethane for a clear finish that won’t yellow with age.
- Wax Finishes: Wax provides a soft sheen and can be applied over oil finishes for added depth. It requires regular reapplication but is easy to maintain.
Application Techniques for a Professional Finish
Achieving a flawless finish requires attention to detail during application. Follow these steps for the best results:
- Test First: Always test your finish on a scrap piece of wood to see how it interacts with the reclaimed wood.
- Use Quality Brushes: Invest in high-quality brushes or foam applicators to avoid brush marks and ensure even coverage.
- Thin Coats: Apply several thin coats rather than one thick coat. This helps prevent drips and allows for better adhesion between layers.
- Sand Between Coats: Lightly sand between each coat of finish to promote adhesion and smoothness. Use a fine-grit sandpaper and ensure the surface is clean before applying the next coat.
Final Touches
Once you have achieved your desired finish, allow ample drying time according to the manufacturer’s instructions. For extra protection, consider applying a final coat of paste wax or a clear topcoat.
Finding Plans and Resources
If you are looking for furniture plans that incorporate reclaimed wood, Ted Woodworking offers a wealth of resources. Their extensive library includes detailed plans that cater to all skill levels, making it easier for you to create your next project with reclaimed materials.
Conclusion
Achieving a professional finish on reclaimed wood furniture requires careful preparation, precise joinery, and skilled application of finishes. By following these advanced techniques, you can enhance the beauty of reclaimed wood and create stunning, long-lasting furniture pieces that tell a story.
FAQ
1. Can I use reclaimed wood for outdoor furniture?
Yes, but it is essential to use finishes specifically designed for outdoor use to protect the wood from moisture and UV damage.
2. How do I remove old finishes from reclaimed wood?
Use a chemical stripper or sanding to remove old finishes. Be cautious with sanding to preserve the wood's character.
3. What is the best way to maintain reclaimed wood furniture?
Regular dusting, occasional oil application, and avoiding excessive moisture will help maintain the appearance and integrity of reclaimed wood furniture.
📚 Related Articles
🔨 Want 16,000+ Woodworking Plans?
Get instant access to step-by-step plans with blueprints and cut lists.
Get Instant Access →