Introduction
Antique furniture holds a wealth of history, craftsmanship, and character. However, over time, even the most exquisite pieces can suffer from wear and tear, especially at their joints. Understanding how to repair these damaged joints is crucial for preserving the integrity of the piece. In this article, we will explore advanced joinery techniques that can help restore your antique furniture to its former glory.
Understanding the Importance of Joints
Joints are the backbone of any furniture piece, providing structural stability and aesthetic appeal. In antique furniture, the type of joint used can often tell a story about the craftsmanship of the time. When repairing joints, it's essential to choose methods that respect the original construction while ensuring durability. Let's discuss some advanced techniques that can be employed.
Types of Joints Commonly Found in Antique Furniture
- Dovetail Joints: Renowned for their strength and resistance to pulling apart, these joints are often found in drawers and carcasses.
- Mortise and Tenon Joints: These provide excellent structural integrity, commonly used in table legs and frames.
- Lap Joints: Often used in case goods, they are simpler but can be effective when repaired correctly.
- Finger Joints: These are less common but can be found in decorative pieces, requiring precise cutting for a seamless look.
Assessing the Damage
Before beginning any repair, it is crucial to assess the extent of the damage. Look for signs of wear, separation, or cracks in the joints. Understanding the type of joinery originally used will guide you in selecting the most appropriate repair method. Here are some common signs of damage:
- Visible cracks or splits in the wood.
- Loose or wobbly joints that no longer hold together.
- Gaps where the joint has separated.
Repair Techniques
Now that we've assessed the damage, let's dive into some advanced joinery techniques for repairing damaged joints in antique furniture.
1. Re-gluing Loose Joints
For joints that have become loose, re-gluing is often the first step. Here’s how to do it:
- Carefully disassemble the joint.
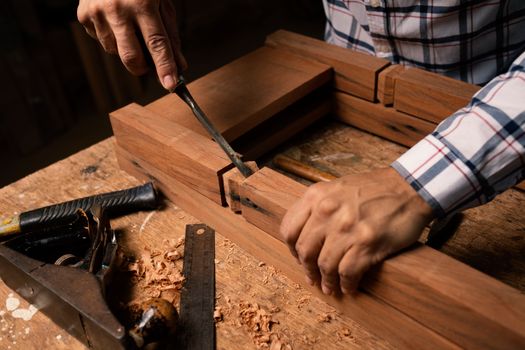
- Clean the surfaces of old glue and debris using a chisel or scraper.
- Apply a high-quality wood glue, ensuring even coverage.
- Reassemble the joint and clamp it securely, allowing it to cure for at least 24 hours.
2. Reinforcing with Dowels
If the joint is significantly weakened, consider reinforcing it with dowels:
- Align the pieces accurately and drill holes for the dowels using a doweling jigs.
- Insert the dowels with glue, ensuring they fit snugly.
- After the glue has cured, trim any excess dowel material and sand the joint smooth.
3. Using Splines for Added Strength
In cases where the joint has cracked, using a spline can provide additional strength and stability:
- Cut a groove along the crack using a table saw or router.
- Prepare a spline from a matching wood species and insert it into the groove with glue.
- Clamp until dry, then sand the joint flush.
4. Replacing Damaged Sections
Sometimes, the damage may be too extensive for a simple repair. In these cases, replacing the damaged section is necessary:
- Identify the damaged area and remove it carefully with a chisel.
- Cut a replacement piece to fit precisely into the void.
- Use matching joinery techniques (mortise and tenon, dovetail, etc.) to attach the new piece.
Finishing Touches
Once the repairs are complete, it’s essential to finish the joint properly to ensure it blends seamlessly with the antique’s original finish:
- Sand the repaired area gently to ensure a smooth surface.
- Apply stain or finish that matches the original piece. This may require mixing colors to achieve an exact match.
- Consider using a protective topcoat to guard against future wear.
Resources for Further Learning
If you’re looking to expand your joinery skills and techniques, resources like Ted Woodworking offer comprehensive plans that cover everything from basic repairs to advanced furniture building.
Conclusion
Repairing damaged joints in antique furniture requires a keen understanding of joinery techniques and a commitment to precision. By utilizing the methods outlined above, you can restore not only the function but also the beauty of your cherished pieces. Remember, the goal is to maintain the integrity of the original design while ensuring durability and a professional finish.
FAQ
1. What type of glue should I use for furniture repairs?
Use a high-quality wood glue that is appropriate for the type of wood you are working with. PVA glue is commonly used for most applications.
2. How can I match the finish of my antique furniture?
Mix different wood stains to achieve the desired color, and test on a hidden area before applying it to the repair.
3. Is it necessary to disassemble the joint for repairs?
In most cases, disassembling the joint allows for a thorough cleaning and ensures a better application of glue or reinforcement materials.
📚 Related Articles
🔨 Want 16,000+ Woodworking Plans?
Get instant access to step-by-step plans with blueprints and cut lists.
Get Instant Access →